Hey e'erone. I know I started to holler at you about my kitchen projek last week, and I now have a nice place to store my pictures online so that I may discuss them more easily. You should keep in mind that I'm still developing the phototographer's eye so don't be critical. My mother and sister are the resident photographers, well as resident as they can be when they both live hours away in different directions. I guess this Instaweb really makes the world smaller (sigh).
Anyway, the following picture shows the great idea we had to find out where we could run wires for the light above the sink. We needed a "hand-hole" through which to grab the wire and make the turn down the wall. Since we couldn't get the wire all the way to the hand-hole, this was all for naught. However, it did teach me how not to patch a big hole in the ceiling. I'd also like to point out that the holes in the wall were the method we used to probe the wall for openings. As it turned out there is a heating duct behind that wall (oops).

My next shot was taken of the slab of plaster that came out of the wall where we cut the hole for the light switch. I thought it was especially difficult to cut, but I had never before cut plaster with a hand saw, so I didn't realize until I removed the inch-and-a-half-thick hunk of plaster from the wall. My first thought; "What the hell did they need to make the wall so thick for?" That question remains unanswered.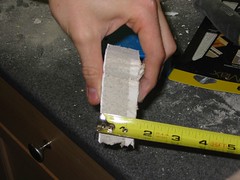
Once the cabinets were down and the electrical was run for the light/switch, I started skim-coating the wall to get rid of the pockmarked look. I always knew the wall was a little rough, but it wasn't until the new light illuminated the wall from the top that I realized how grotesque it really was. There was no way I was going to leave that unrepaired, so I got to skim-coating. Let the record show that I had never before used drywall mud, so I learnt as I went along. The first few coats were a little thick and a little sloppy, but this next picture is just nasty. How someone got grease stains that thick NEXT to the cabinet (between the side of the cabinet and the wall) I'll never know.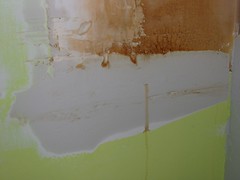
For the record, I studied the grease stains in search of images of Jesus or the Virgin Mary, but there were none.
Once the wall was skim coated about 3 times (maybe it was 4), I gave her a few coats of primer and things were really coming together. Check out the prime-job...
Finally, we were able to install the new cabinets whose former home was the living room. I would like you to understand that there are many steps in between painting the wall and hanging the cabinets, but through the miracle of TV I was able to jump right to the finale. So here's John giving the second cabinet his seal of approval...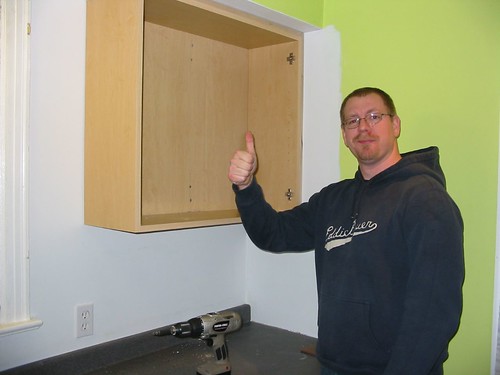
Well, that's all I have for this entry. Perhaps later I can show you a few pics of the hutch turned microwave/toaster oven station. In my former life(style) this also served as the bar. Since the booze-shunning I have been using that space to store crap. After cleaning that up and installing an outlet, the bar/crap station has become home to the microwave and toaster oven (MW/TO), further improving the counterspace problem (there's barely any).
Well, I hope you've all enjoyed my little montage (sp?). I just realized there is another picture that shows how bad the wall was with one cabinet down. When I do my next segment on the MW/TO upgrade, I'll include that picture to really show how far the kitchen has come.
Over and out,
Old Coot

No comments:
Post a Comment